Showing posts with label tutorial. Show all posts

11.14.2011

boutique-style hair bows

We had a small baby shower for baby girl on Saturday with my immediate family... and goodness, she already has so much stuff (and we have another baby shower next Sunday)!  I was going through it all and trying to get organized, and the one thing I noticed she didn't have enough of was... hair accessories!  I know, it seems silly when there are diapers and wipes and bottles to worry about, but every little girl needs cute hair accessories, right?!  So... I've decided this week is going to be pretty hair accessories week on the blog!  Each day I'll be posting a different hair-inspired tutorial, so make sure you check back daily!

Today's tutorial is....

boutique-style hair bows


To make one bow, you will need:

  • 38 inches of 2 inch wide grosgrain ribbon
  • one double prong clip (or other clip variety)
  • hot glue gun and hot glue
  • needle and embroidery thread
  • ruler
  • marker
Start by laying out the 2 inch wide ribbon.  Measure 4 inches, cut, and set aside.  That should leave you with 34 inches of ribbon.  Measure 4 inches again and use your marker (you'll want to use a marker so that it bleeds through to the back) to make a dotted line along the width of your ribbon.  This will be one of the tails.


Now measure 6 inches from your dotted line.  Make another dotted line along the width of your ribbon.  Repeat three times for a total of four 6 inch sections.  These sections are going to be the loops.


After marking your first 4 inch section and the four 6 inch sections, you should have one more 4 inch section left.  This section will be the other tail.


Now, take your needle and embroidery thread (if you don't have embroidery thread, you can use regular thread, but I like how embroidery thread makes the bow a little sturdier) and sew a running stitch along the dotted line at the first 4 inch mark.  Make sure you double knot the end of the thread so it doesn't pull through.


Remember when I said you wanted your marks to bleed through to the back?  This is where that's going to come in handy.  Fold the first 6 inch section so that the back is facing up.  You should still be able to see your dotted line.  Sew a running stitch along that dotted line.


Now fold the next 6 inch section so that the dotted line is facing right side up.  Sew a running stitch.  Keep alternating this way until you've sewn a running stitch along all of your dotted lines.  You should have something that looks similar to this:


With the needle still attached, pull the thread so that it gathers up the ribbon.  Try to keep all right sides facing up as you gather.


After you have pulled the thread tight, wrap it around the center twice and put a stitch right through the middle to secure your bow.


Clip the tails into an angle or a split.  I like the split look, but it's up to you.  Make sure you fray check or heat seal the clipped ends so they won't ravel.  Now, take that 4 inch piece you set aside earlier.  Fold it into thirds lengthwise and tie a loose knot.  Make sure the knot is facing up on the fold.


Put a dab of hot glue directly onto the back of your knot.  Place the knot directly onto the front center of your bow, making sure to cover up the embroidery thread.


Flip your bow over.  Now take your clip and line the front with hot glue.  Make sure not to over glue... you still want to be able to open the clip!  (I used a double prong clip, since my bows will mostly be clipped to headbands and hats for now, but if you are making these for an older girl with more hair to snap into, you may want to use one that snaps.)  Place the clip face down over the center of the back of the bow.


Holding the clip open, wrap one of the knot ends around and hot glue it down.  Trim off the excess.  Repeat with the other knot end.
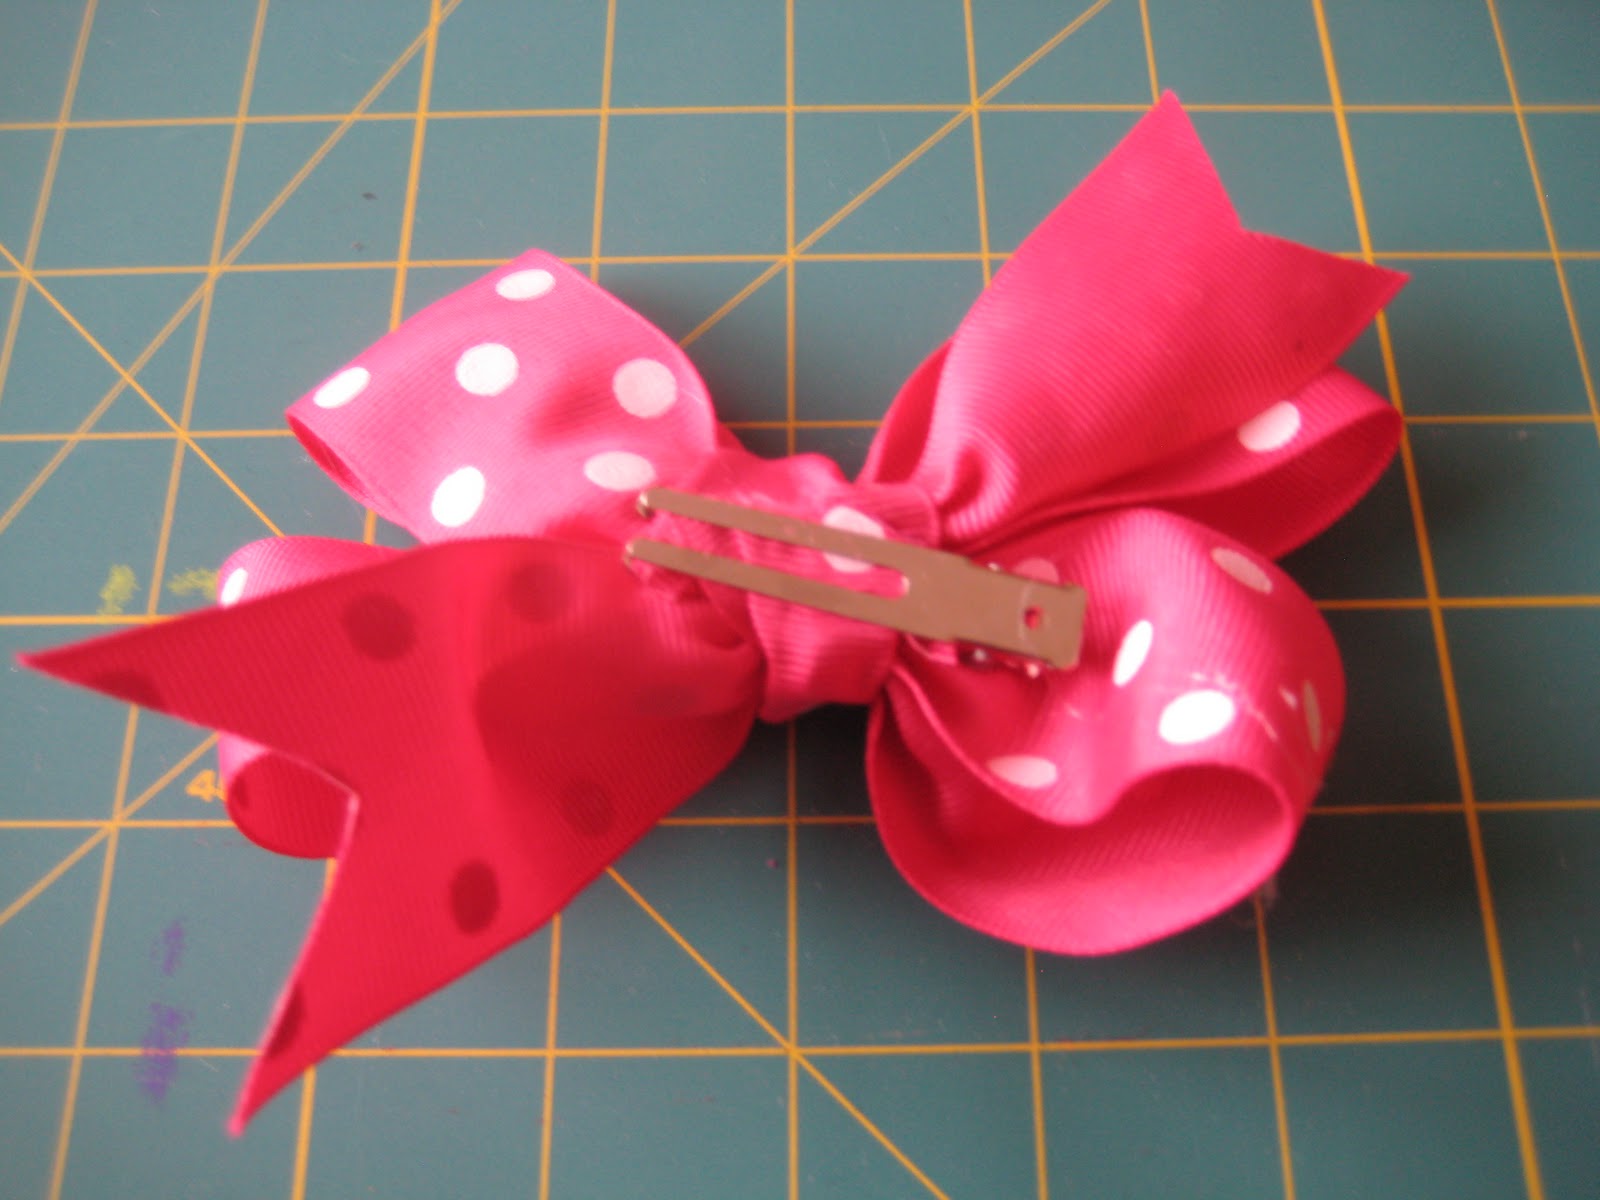

Flip it over and you're finished!  You can make a few variations on these by using a coordinating ribbon for the knot instead of a matching ribbon, like on the pink stripe bow below.


Once you get the hang of it, they only take a few minutes a piece to make, and before you know it, you'll have a ton of pretty bows... plus its a really cute, inexpensive way to accessorize a special little lady.
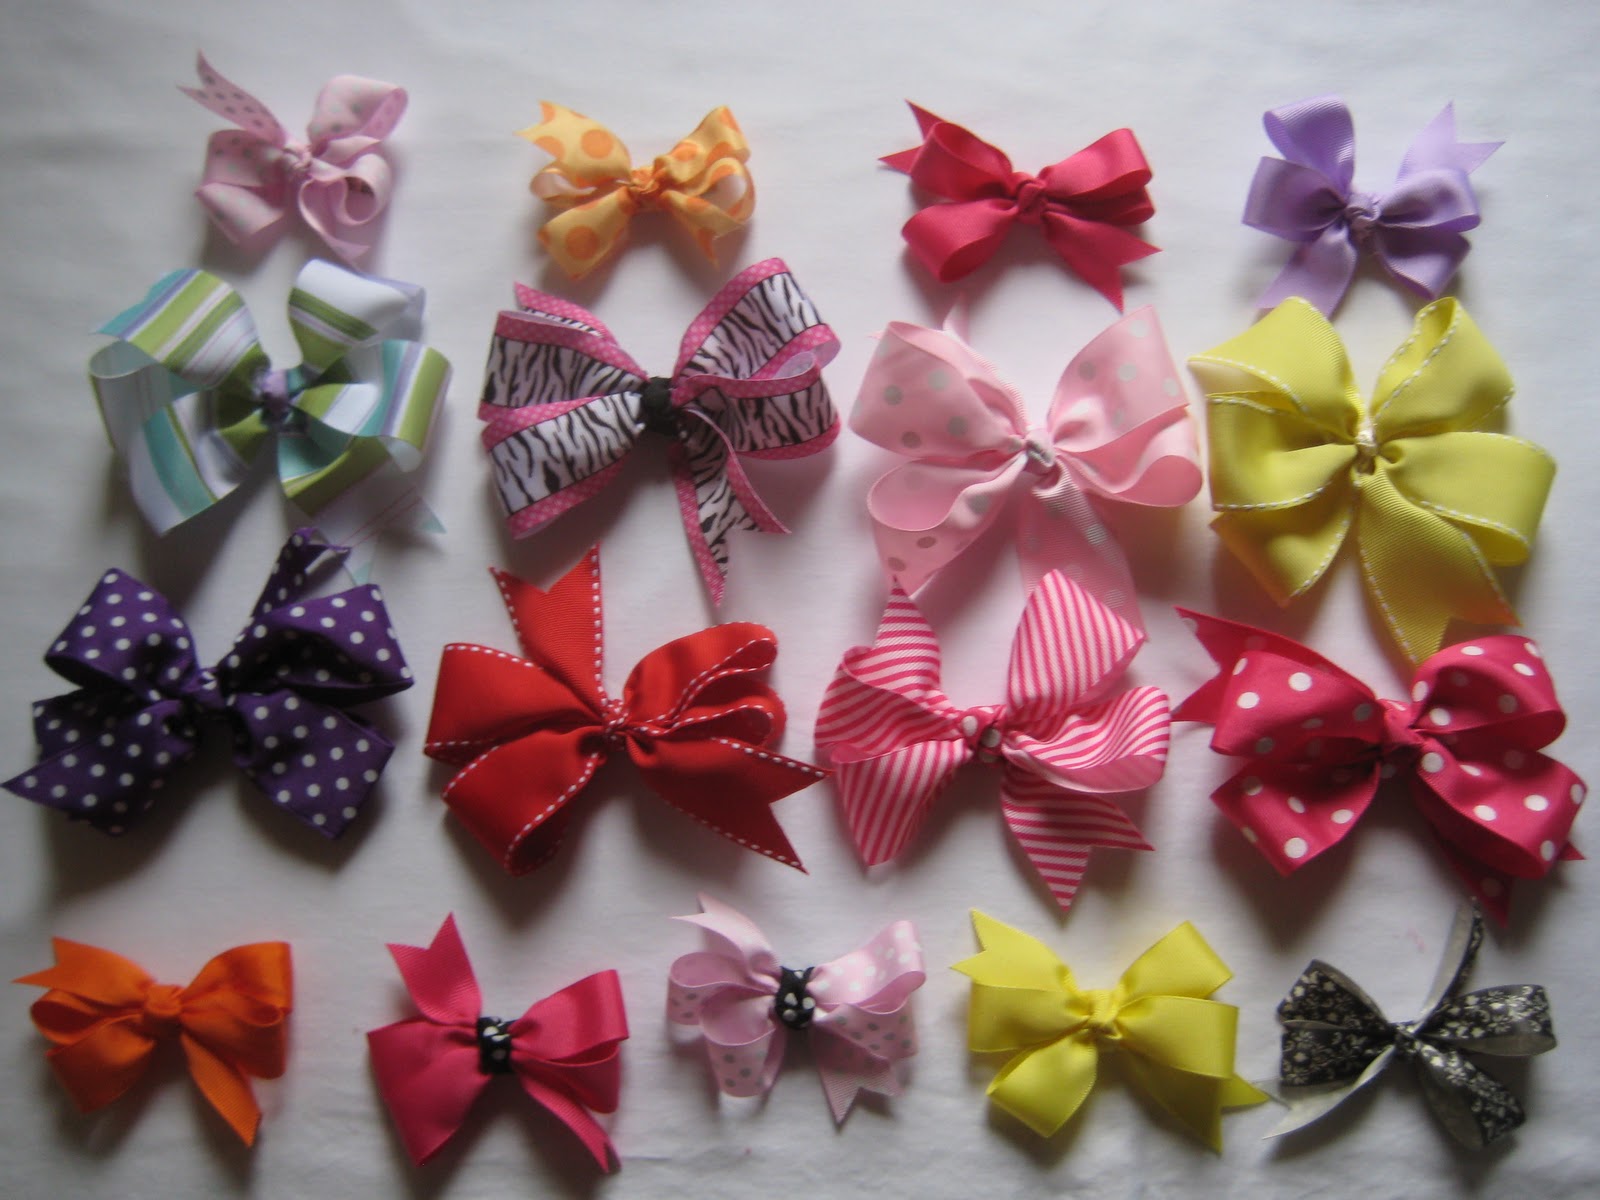

*To make the smaller bows shown above, use a 20 inch long piece of 1 inch wide grosgrain ribbon and follow the directions above, substituting 2 inch sections for tails and 4 inch sections for loops.*

Enjoy your cute new inexpensive boutique-style bows, and make sure to come back tomorrow for the next installment of pretty hair accessories week!

11.01.2011

refashion: men's polo shirt to baby dress

Want to go from this:


to this?


Start with a polo shirt.  I always use a men's shirt because they are bigger... the bigger the shirt is, the more material you have to work with, and the more you have leftover for additional projects, embellishments, etc.  I've never used anything less than a men's medium, but I try for XL or larger.  You can use an old one passed down from a man in your life (baby girl has dresses made from her daddy's shirts and her uncle's shirts) or one you found at the thrift store for fifty cents.  If you are getting your shirt from the thrift store, I have a few words of advice:  1. Don't overpay.  Goodwill and "chain" thrift stores usually charge between $3 and $5 per shirt.  Don't pay that!  If you have to go to goodwill, wait until their dollar days, when you can find them for a dollar and stock up.  If you can, go to a "mom and pop" thrift store.  The shirts there are almost always $1, and I've found a few on sale for $.50... and they usually have a better selection.  2.  Check the armpits.  That sounds disgusting, I know... but do you really want to dress a little girl in sweat stains?  I only buy shirts with the tags still attached or that show little to no signs of wear... otherwise it's not worth it to me.

Now that you've got your shirt, wash it in hot water and dry it.  Then, break it down by cutting along all the joining seams... no need to use your seam ripper, just clip right beside the seam.  IMPORTANT: Do NOT take out the hem or the sleeve hem.  Just the joining seams.  I like to cut out the placket as well, because it's porportionally too large to use on a little dress, and is otherwise useless... I do save the buttons and the collar, though this is completely optional.  When you finish breaking your shirt down, you should have something that resembles this:


Set it aside, and start on your pattern pieces.  You'll need a onesie or dress in the size you are wanting to make.  This isn't an exact science... there's a little bit of guess work involved (especially if your babe is still in your belly!), but it's pretty simple.  Take your onesie or dress and fold in half longways.  Place the fold along the edge of your paper and trace around the collar (Make sure you trace the different openings for the front collar and back collar) to the seam of the top of the sleeve, then from the seam at the bottom of the sleeve to the point you want the bodice to end.  I stop about an inch below the bottom of the sleeve, but you can adjust that according to the size you are making and your personal preference.


Remove the onesie and connect from the top of the sleeve to the bottom of the sleeve.  I just eyeball it based on the way the sleeve is connected on the onesie.  Use a grid to add a 1/4 inch seam allowance to joining seams.  Make sure you don't add to the collar or to the sleeve.  You're now finished with your bodice pattern!

Now, place your folded onesie on the edge of another piece of paper.  Make a mark at place you stopped for the bodice piece. Decide how wide you want your skirt to open at the bottom and half it.  I like for mine to be twelve inches, so I measure out six inches.  Make a mark somewhere near the bottom of your paper, and use a ruler to diagonally connnect the top mark to the bottom mark.  Now decide how long you want your skirt.  This is completely up to you, but I like to go three inches below the bottom of the onesie... shorten or lengthen based on size and personal preference.  Using a ruler, draw a straight line from the edge (where the fold was) out to the width mark.  That's your hem.  Now, use your ruler to add a 1/4 inch seam allowance to the side seam as well as the top seam.  Do NOT add to the hem... and your skirt pattern is finished!


Now for the sleeve pattern.  You'll need the same piece of paper you drew your bodice pattern on.  Place the seam of the sleeve of your onesie along the sleeve seam you drew on your pattern.  Trace the sleeve.  Add a 1/4 inch seam allowance to the joining seam of the sleeve... and your sleeve pattern is finished!


 Now cut out your pattern pieces and you should have three pieces that resemble this:


The hardest part is over!  Now use your pattern pieces to cut out your fabric (you'll need two of each piece).  I like to start with the skirt first.  Fold the body of a shirt piece in half and place the fold edge of your pattern along the fold and the hem edge of your pattern along the hem.  Pin in place and cut.  Repeat.


I like to cut the bodice piece along the same fold right above the skirt, so that I don't have to unfold and refold.  Make sure that when you are cutting the bodice piece, you cut a piece with a front collar and a back collar. 

Now grab the sleeve you cut from the shirt and the sleeve pattern piece.  Fold the sleeve piece of the shirt in half (making sure to line up the sleeve hem) and place the fold part of the sleeve pattern piece along the fold and the hem part of the sleeve pattern piece along the hem of the sleeve.  Pin in place and cut.  Repeat on the other sleeve.  Now take one of the scraps and cut a 2 inch by 18 inch strip.  We will use this to finish the collar.  Save the rest of the scraps for embellishments or other projects.


Now that you have all your pieces cut out, you are ready to assemble! (Here I switched to some pieces I had previously cut out... I ran out of green thread!)  I like to start with the skirt.  Take your two skirt pieces, pin right sides together, and serge or zig-zag the sides.  Make sure to leave the top open!  Turn right sides out and press the seams.


Set the skirt to the side.  Take your two bodice pieces, pin right sides together, and serge or zig-zag only the shoulders and the sides.  Make sure to leave the sleeves, collar, and bottom open!  Turn right side out and press the seams.


Now for the sleeves.  Fold right sides together and serge or zig zag only the bottom seam that forms the sleeve... make sure you leave the side seam where sleeve and bodice come together open! Turn right side out and press.  Now to join the sleeves to the bodice.  Start with both pieces right side out and line up the bottom sleeve seam and the side bodice seam.  Pin. 


Now fold the bodice piece inside out over the sleeve piece and pin all the way around the sleeve.  Serge or zig-zag.  Repeat for the other sleeve, then turn and press.


Now for the binding strip... take the 2"x18" strip, fold in half longways and press.  Now fold each half in half longways and press.  Now fold back over and press.  You should end up with a 1/2 inch by 18 inch strip. Pin that strip all the way around the collar and topstitch in place.  You're finished with the bodice!  Now you should have two pieces that resemble this:


Now switch to an elastic bobbin.  (You can continue with a regular bobbin by doing a gathering stitch and then stitching in place, but it's so much simpler with the elastic bobbin and it makes for stretchier dress.)  Pin your openings right sides together and stitch.  Iron over the elastic to help it draw up.  Turn your dress right side out and you're finished!  You can leave it plain, or use scraps to embellish.


You can do a flower.


You can do a ruffle.


You can even do both.


You can even use the scraps to make matching headbands!


... and pretty soon you'll have a whole cluster of inexpensive, repurposed, adorable handmade dresses for a special little lady.


10.28.2011

patchwork pincushions

While getting things organized in this new spot, I'll be bringing over a few tutorials from an old blog.

I'm going to go ahead and admit something... I've never had a pincushion, until now. I've never found one that was cute enough to buy, and I always intended to make one... I just never got around to it. That was until I saw all these cute patchwork pincushions, and I wanted to make one. Trouble is, I didn't know how, and I didn't want to buy a book simply for a pincushion pattern... so, I figured it out on my own. It took all of 30 minutes to figure it out, cut it out, and sew it up... so easy! Plus, the end result is super cute!


DISCLAIMER: I do things my way, not necessarily the best or the right way... but it works. Hopefully this will give you an idea on how it's done, and you can find your own best way to make them!

First, you will need:
6 charm squares or fabric scraps
4 buttons
matching embroidery thread
embroidery needle
compass or bowl
paper
scissors
sewing machine
rotary cutter

Start by picking out your charm squares or fabric scraps (make sure they coordinate). I love the Heather Bailey Nicey Jane collection, so I used some charm squares from a charm pack I had... can't wait to share what I'm doing with the rest of them! Arrange the prints in the order you want them... I tried to make sure I didn't have my florals together.


Set those aside. Take your compass and set it to whatever radius you want your circle to have. A 2-3 inch radius works best (4-6 inch diameter). If you do not have a compass, just trace a bowl! Cut out your circle.


Fold your circle in half, then fold the half circle into thirds. Tape it together. This is your template!


Start with your first piece of fabric. Fold it in half and place the middle of the arc of the template on the fold of your fabric.


Cut around the template, following the lines out to the fold of the fabric. DO NOT cut around the arc! Hint: Make sure you do not slice any of the template off... you don't want your pieces getting smaller as you go!


Once you have gotten all of your pieces cut, pin the first two pieces with the right sides together, and run them through your machine. I used a 1/4 inch seam allowance, but it really doesn't matter as long as you are consistent.


Now, take the template and put the point facing the unsewn point of the diamond, centering the arc over the sewn point of the diamond. Trace the arc so that the ends of the arc are on the seam. Sew over the arc you have traced.


Continue adding your pieces on this way until you have all of your pieces sewn together. On the joining seam, leave 1 inch at the bottom unsewn for turning and stuffing. Turn... and stuff! Make sure you stuff it full enough so that the pins won't slip out if your pincushion gets turned upside down.


Once you have gotten it stuffed, stitch up the opening. Thread your embroidery needle and stitch through the middle, covering each seam. Sew your buttons onto the middle. These are so great, because they are super cute, and hide all those stitches and knots from the embroidery thread... and adding them to the top AND bottom means you can use either side!


Voila! You're finished, and you have a cute new pincushion to use for yourself or give to a friend!